
EasySkin provides a simple and easy way to bring cohesion to skin tones into your scene.
If you've ever felt a little lost when trying to correct skin tones in DaVinci Resolve, you're not alone. I spent countless hours struggling to find a workflow that I enjoyed for correcting skin tones and making them more cohesive for my videos.
EasySkin is built to speed up workflows for those fast client turnarounds with a simple interface and user friendly sliders, dropdowns and colour picker interface.


Use the slider above to see before and after. EasySkin enables you to make skin tones match in your scene more cohesively.
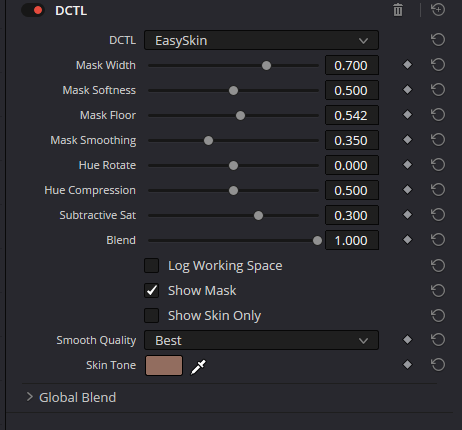
Simple controls make it easy to get setup in DaVinci Resolve:
1 - Add DCTL to your last node in the colour page.
2 - Select ‘EasySkin’ from the dropdown.
3 - Use the Skin Tone colour picker to select skin tone in your scene.
4 - Refine the mask using Mask Width, Mask Floor and smoothing.
5 - Isolate your view to either the mask or skin only.
6 - Adjust skin tones using Hue Rotate, Hue Compression & Subtractive Sat
Powerful Masking
EasySkin lets you see your skin selection in 2 masking views to enable you to narrow down and fine tune your settings.
A skin qualifier is normally invisible, so you end up nudging sliders and hoping. Show Mask puts it on screen as false colour over a mono base, so you can see what has been picked up and how strongly each part of the frame sits in the selection.
Yellow is a full selection, and that is what you are aiming for across the face. The cooler colours are partial, so a little blue scattered through the background is only a 15 to 30% pick and will not show in the final grade. Widen the mask until the face reads yellow, then bring the floor up until the shirt and the walls fall away.


Show Skin Only holds the selection in colour and neutralises everything else, which leaves the vectorscope reading skin on its own. Wardrobe, wood floors and warm walls stop pulling the trace around, so what you see on the scope is the thing you are actually grading.
From there the three controls each do one job. Hue Compression tightens the spread, Hue Rotate sits the trace on the skin line, and Subtractive Sat sets how far out it sits.

EasySkin is a single node at the end of your tree, and works on any project you like.
Not sure if this will work for you? Try out the free trial below!
Requires DaVinci Resolve Studio 17 or later. DCTLs will not load in the free version of Resolve.